➿ Custom Interaction with Login
In this section you will see how to build a Unity project with a login button to connect a web3 wallet and two other buttons to write and read the contract.
Getting Started
Start by creating a new project by following the steps at the section Create a new Unity project. Make sure to install all dependencies to fix all bugs.
Use the WebLogin prefab to enable web3 wallet connection
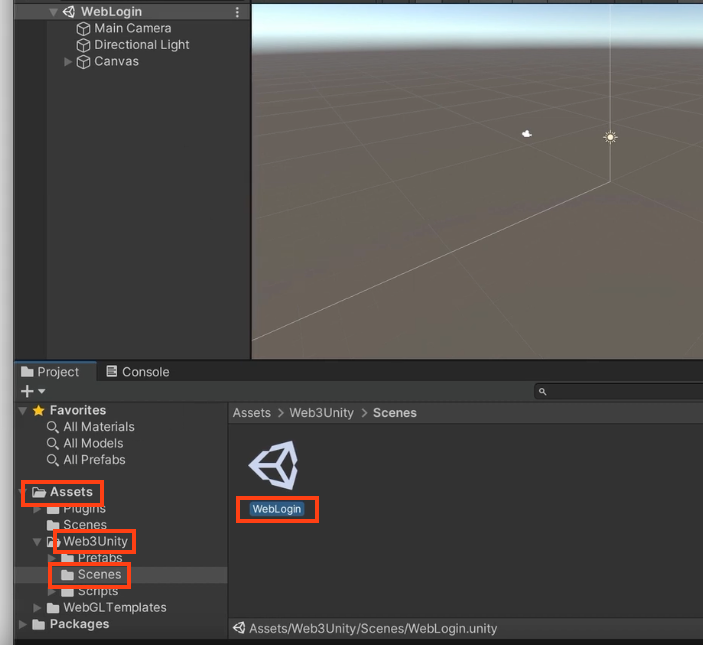
Under Assets → Web3Unity → Scenes, double-click on WebLogin. This is the prefab used to connect a wallet in a WebGL project.
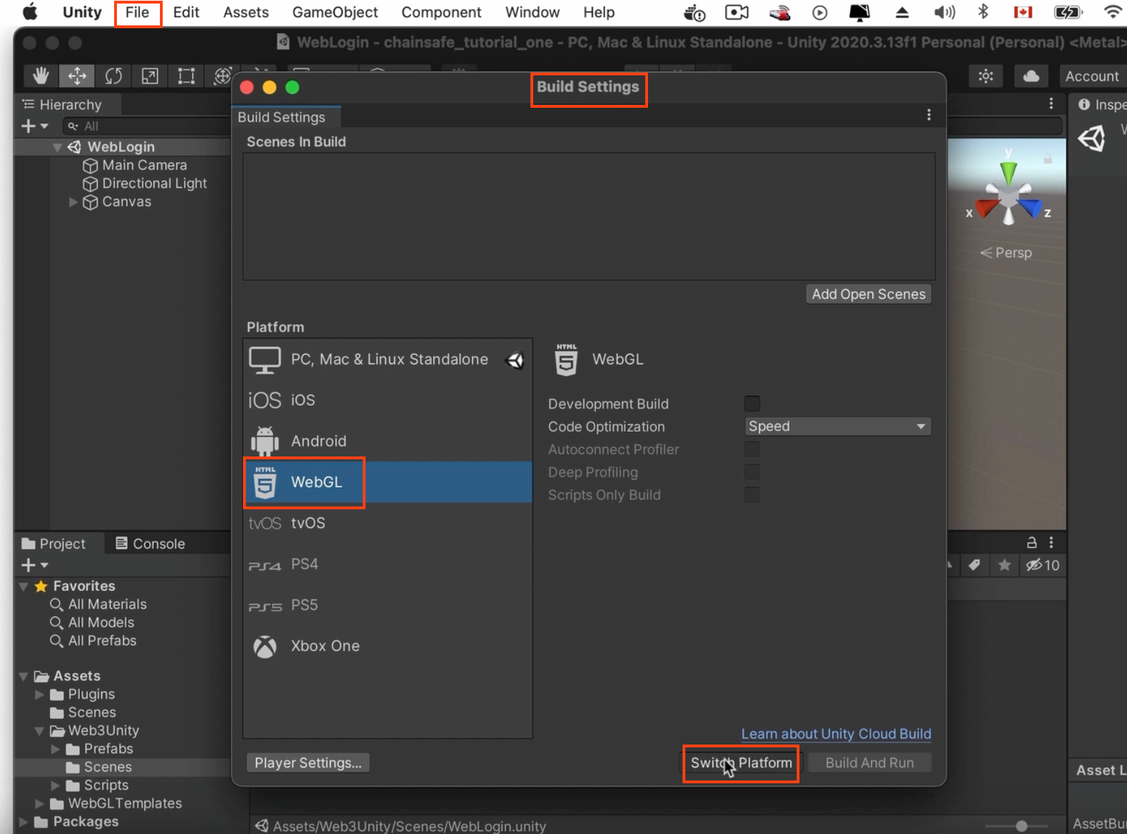
Go to File → Build Settings → WebGL → Switch Platform
From the same window, click on Add Open Scenes (top right) to add the Login scene as the first scene to appear when we run the project.
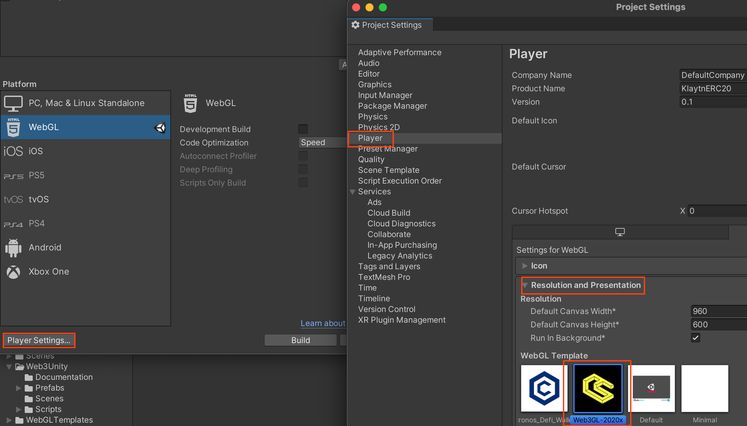
From the same window, click on Player Settings → Player → Resolution and Presentation, under WebGL Template, select the one with the same as our Unity version (WebGL 2020 for our case).
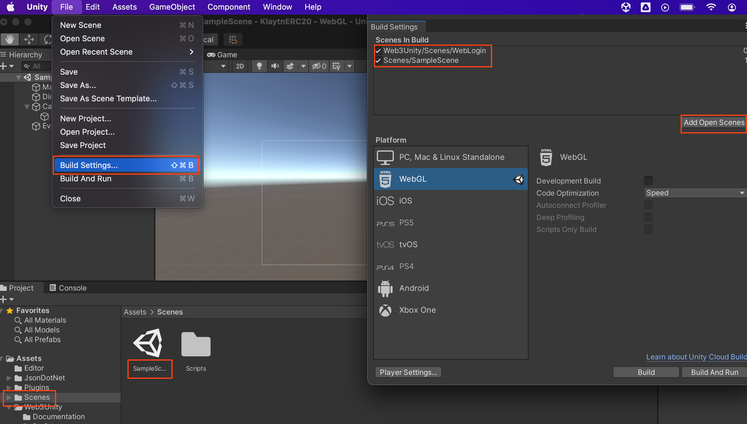
Go back to the Unity project. Under Assets, select Scenes and double-click on SampleScene to use it as our second scene (FYI the first one is the login scene).
Go to File → Build Settings → Add Open Scenes. The SampleScene will appear under the WebLogin scene. It means the SampleScene, where we will create the buttons to read and write to the contract, will be the next scene after the WebLogin.
Make sure the WebLogin scene is at the top because the order matters.
Create your Contract
- Open Remix IDE, install the Kaia Remix plugin then paste the code below:
// SPDX-License-Identifier: MIT
pragma solidity ^0.8.0;

contract Storage {

    uint256 number;

    function store(uint256 num) public {
        number = num;
    }

    function retrieve() public view returns (uint256) {
        return number;
    }
}
- Compile your contract and deploy it to kairos testnet (get your faucet here).
Create your C# script on Unity
Under Project window, right-click on Scenes, click on Create → C# Script
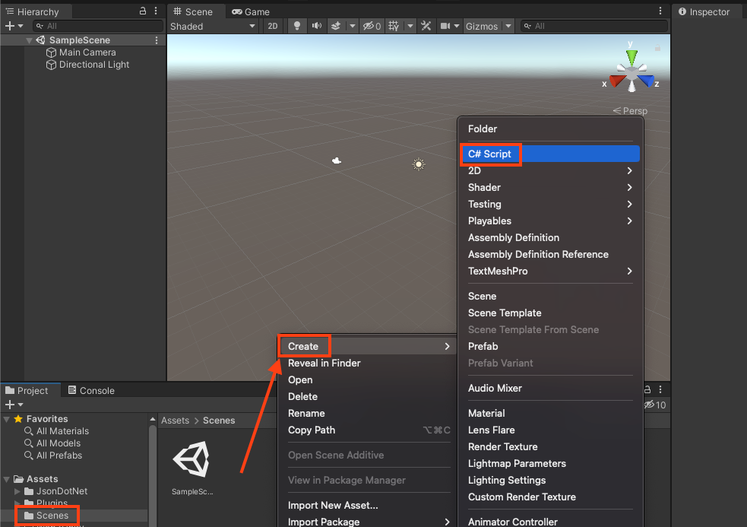
Rename it (here we’ll use the name “CallABI”)

Double-click on the script to open it. Complete the script with the information below:
using System.Collections;
using System.Collections.Generic;
using UnityEngine;
using System;

public class CustomCallABIExample : MonoBehaviour
{

    // set chain
    string chain = "klaytn";
    // set network
    string network = "testnet";
    // set contract address
    private string contract = "0xDf5A1aAa8C1E6a7b4e42dA606Ed8e43BeF764D13";
    // set contract ABI
    private readonly string abi = "[{\"inputs\":[{\"internalType\":\"uint256\",\"name\":\"num\",\"type\":\"uint256\"}],\"name\":\"store\",\"outputs\":[],\"stateMutability\":\"nonpayable\",\"type\":\"function\",\"signature\":\"0x6057361d\"},{\"inputs\":[],\"name\":\"retrieve\",\"outputs\":[{\"internalType\":\"uint256\",\"name\":\"\",\"type\":\"uint256\"}],\"stateMutability\":\"view\",\"type\":\"function\",\"constant\":true,\"signature\":\"0x2e64cec1\"}]";
    // set RPC endpoint url
    string rpc = "https://public-en-kairos.node.kaia.io";

    // Call the "store" function with "10" as argument
    async public void AddValue()
    {
        // contract function
        string method = "store";
        // argument
        string args = "[\"10\"]";
        // value in ston (wei) in a transaction
        string value = "0";
        // gas limit (OPTIONAL)
        string gasLimit = "";
        // gas price (OPTIONAL)
        string gasPrice = "";

        try
        {
            string response = await Web3GL.SendContract(method, abi, contract, args, value, gasLimit, gasPrice);
            Debug.Log(response);
        } catch(Exception e)
        {
            Debug.LogException(e, this);
        }
    }

    // Call the retrieve function
    async public void GetValue()
    {
        // contract function
        string method = "retrieve";
        // arguments
        string args = "[]";
        try
        {
            string response = await EVM.Call(chain, network, contract, abi, method, args, rpc);
            Debug.Log(response);
        } catch(Exception e)
        {
            Debug.LogException(e, this);
        }
    }
}
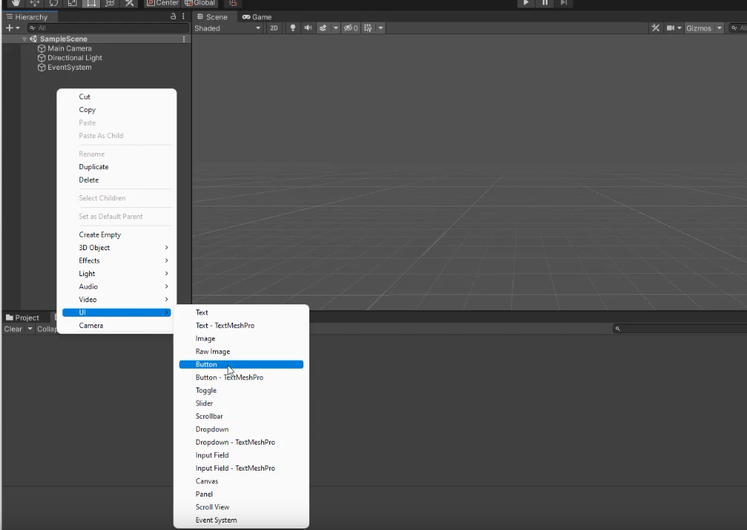
Create the buttons
Right-click on the scene, click on UI → Button and rename it to AddValue and RetrieveValue
To interact with the buttons:
-
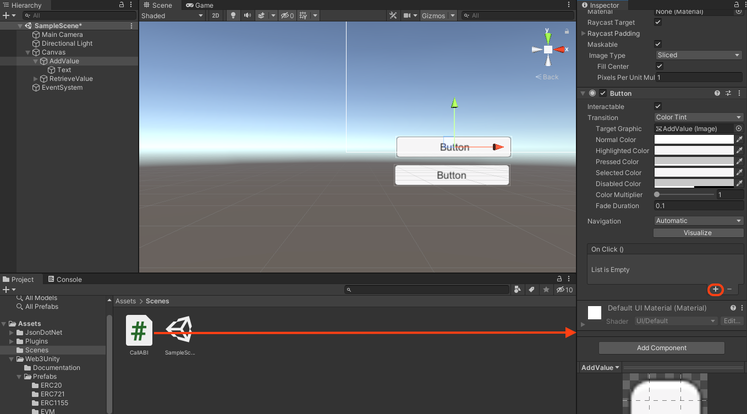
Click on AddValue button from the Hierarchy window
-
Drag the CallABI script into the right window
-
Add an On Click() function by clicking on the ➕ button
-
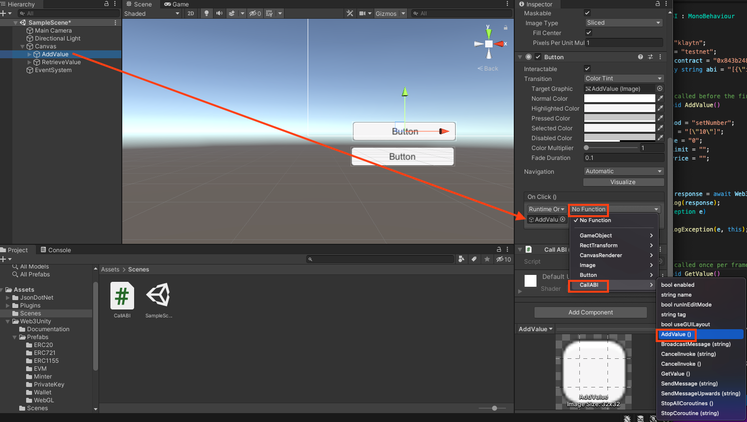
Drag the AddValue button from Hierarchy window into the On Click() function
-
Click on No Function → CallABI → AddValue()
For the RetrieveValue button, redo the steps from step 1 to step 5 above, but instead of selecting AddValue, select RetrieveValue.
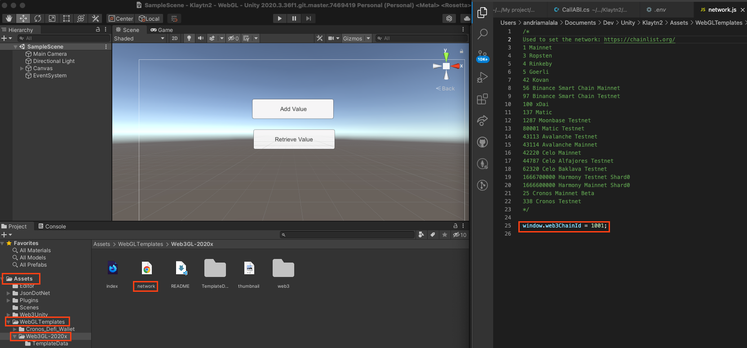
Edit the network chainID under Assets → WebGLTemplates → Web3GL-2020x → network.js. Set the window.web3ChainId to 1001.
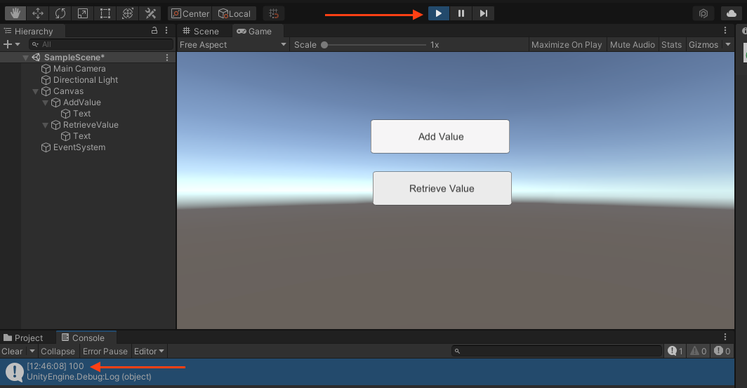
To test the Retrieve Value function, click on play ▶️ and click on Retrieve Value
To test the Add Value function , click File → Build and Run. You will have a new window in the browser that will show you the login interface.
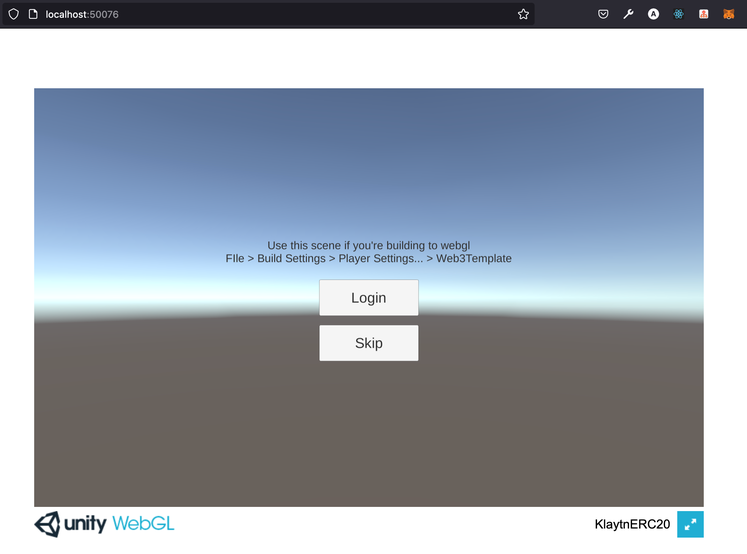
Click on Login to connect to Metamask.
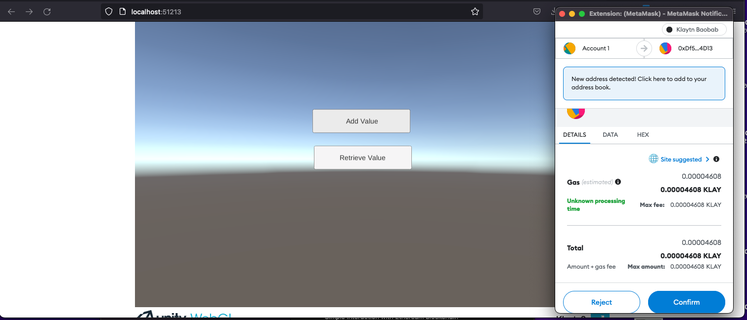
Click on Add Value to add the value of 10 to the contract.
Confirm your transaction on Metamask and voilà ! Your transaction is sent to the network.
If you have any questions, please join our Discord server, or send us an email at developers@kaia.io